In a world that moves fast, convenience matters more than ever. Knowing how to scan with smartphone can transform piles of papers into tidy digital files in seconds. It’s quick, simple, and incredibly practical. Read on to learn the full process.
Key Takeaways:
- Your smartphone can function like a traditional scanner by using the camera or a scanning app to capture documents clearly.
- Good lighting and a steady hand help you produce sharp, readable scans without shadows or distortion.
- Scanning apps improve the final result with features like auto-cropping, filters, and PDF exporting.
What Is Smartphone Scanning and Why Is It Popular?
Smartphone scanning refers to the process of using your phone’s camera (along with dedicated scanning apps) to convert physical documents, photos, or other paper materials into high-quality digital files such as PDFs or JPEGs.
Instead of relying on bulky flatbed or office scanners, this method takes advantage of your phone’s portability and intelligent software to produce clean scans wherever you are. As long as you understand the principles and the nooks and crannies, you can scan whatever you see, just like taking a photo.
Its surge in popularity is driven by several factors:
- Convenience: Your smartphone is always nearby, making it easy to scan without special equipment or a designated location.
- Speed: Most scans take just seconds. As easy as opening the app, capturing, and saving or sharing.
- Improved Quality: Modern smartphone cameras paired with AI-powered apps now offer sharp results with auto-edge detection, perspective correction, and reduced glare.
- Multifunction Features: Apps combine scanning with cloud storage, OCR, instant sharing, and organizational tools, resulting in a unified document workflow.
- Cost-Effective: No extra hardware is required, and many scanning apps are free or inexpensive.
Also Read: Engineered for Endurance: 10 Best Rugged Smartphone Choices
How to Scan with Smartphone Through Various Apps
Here’s a clear guide covering the best way to scan documents using your phone, featuring four reliable options, namely Google Drive, iPhone Notes, Adobe Scan, and CamScanner. Each explained with simple steps to help you scan smoothly anytime, and some tips along with it.
1. Google Drive Scan

If you’re looking for how to scan with smartphone, Google Drive provides a simple built-in tool that quickly detects document edges and captures clean results. It’s perfect for anyone who needs a fast and reliable way to digitize files before moving on to the step-by-step process.

To scan with Google Drive:
- Open the Google Drive app and sign in to your Google account.
- Tap the big “+” button, usually at the bottom right.
- Select “Scan.” (camera icon)
- Aim your phone’s camera at the document. It works better with good lighting and clear document edges.
- Let Google Drive auto-capture or tap the shutter manually.
- Edit the scan by cropping, rotating, or adjusting brightness and filters.
- Tap “Save” and your document is saved as a PDF in your Drive.
- You can rename the file for organization.
Google Drive’s scanner is ideal for users fully integrated into the Google ecosystem. It saves directly to Drive for quick cloud access. To improve scan quality, use strong lighting and adjust the crop manually before saving. Overall, it’s a solid option for fast, straightforward cloud-backed scans.
Also Read: Value Unlocked: The Best Budget Smartphones for 2025
2. Notes Scan on iPhone
The iPhone Notes app is a reliable choice if you want a built-in approach to scanning with a smartphone. It detects document edges automatically and requires no extra installations. With this smartphone scanning tutorial, Apple users can have a smooth scanning experience without a third-party app.
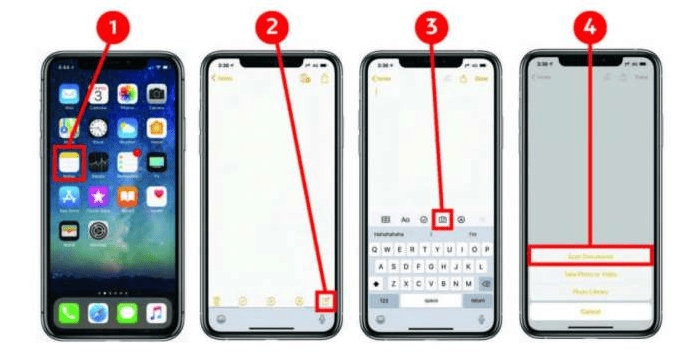
To scan using the Notes App:
- Open the Notes app, head to create a new note.
- Tap the camera icon in the toolbar.
- Select “Scan Documents.”
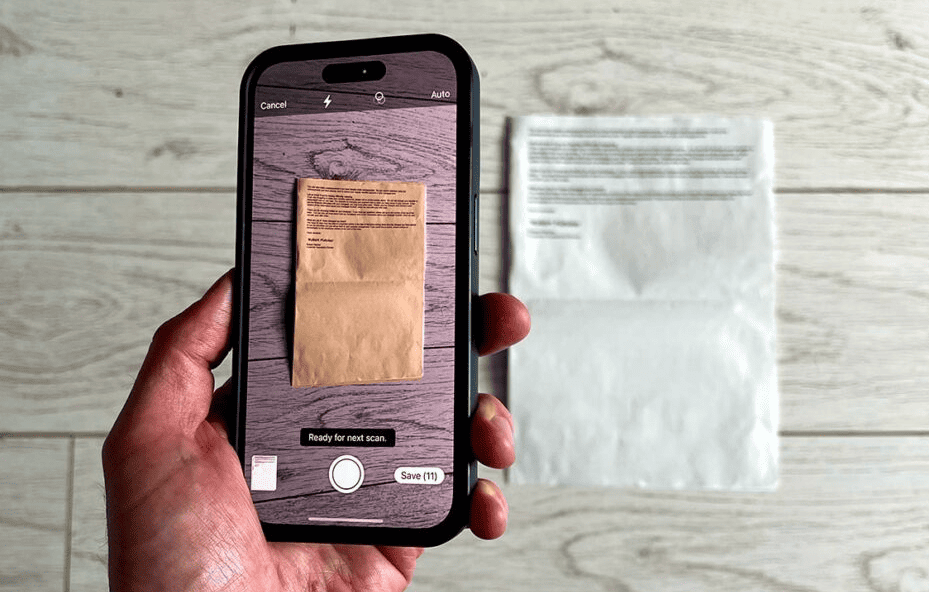
- Position your iPhone over the document. The app will auto-scan when edges are visible.
- Adjust the crop, rotate, or apply filters as needed.
- Tap “Keep Scan” to confirm and continue adding pages.
- Tap “Save” to insert the scan into your note.
The Notes app offers a seamless, built-in scanning tool for iOS users. It automatically detects edges, enhances readability, and works well even for handwritten documents. Since everything syncs through iCloud, your scans remain accessible across Apple devices. A useful trick: you can scan receipts and convert them into searchable PDFs.
3. Adobe Scan

For another polished way on how to scan with smartphone, Adobe Scan offers sharp, enhanced PDFs with reliable auto-capture and built-in OCR. This makes it especially useful for anyone who needs clean digital copies, searchable text, and smooth editing before organizing their documents.

To scan with Adobe Scan:
- Download and open the Adobe Scan app.
- Wait for the camera to activate, then align your document.
- Let auto-capture detect edges and take the scan.
- Crop, rotate, or enhance the image using the editing tools.
- “Keep scanning” and “Save PDF” are options to add pages or finalize.
- Organize and rename the file in Adobe’s cloud storage.
Its OCR feature turns scans into searchable or editable PDFs instantly, making it a favorite among professionals. For challenging documents, switch to manual capture for better control, and make use of Adobe’s text editing tools after scanning.
Also Read: Simplified Connection: 10 Best Smartphones for Seniors
4. CamScanner
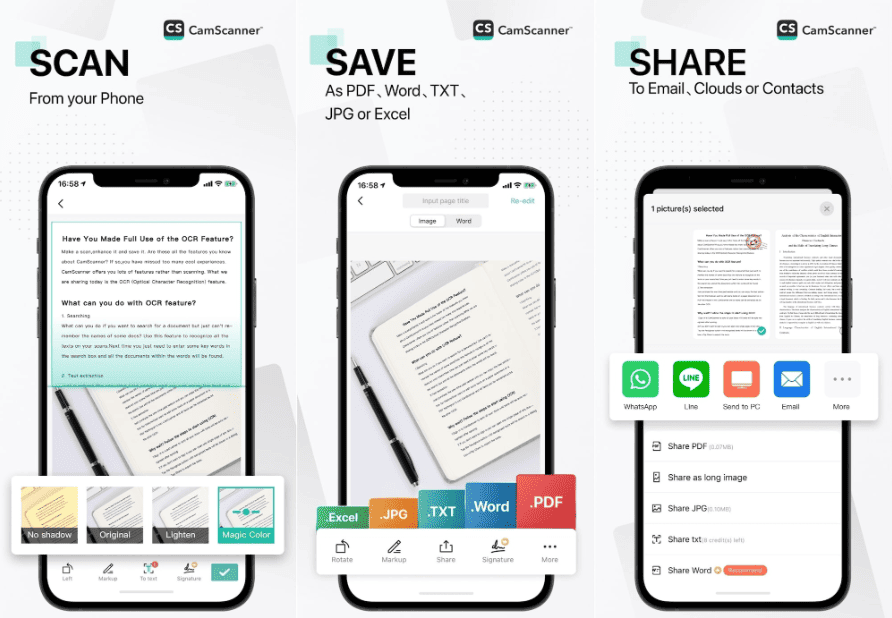
CamScanner offers professional-level flexibility if you’re exploring different options for how to scan with smartphone. With advanced editing tools, customizable filters, and seamless multi-page support. Its intuitive interface makes it easy to capture, enhance, and organize documents for both personal and professional use.
To scan with CamScanner:
- Install or update CamScanner from your app store.
- With the app open, you can scan after selecting the camera icon.
- Grant necessary permissions if prompted.
- Align your phone with the document and tap to capture.
- After capturing, crop, clean up, enhance brightness, or apply filters.
- Add more pages to create multi-page PDFs.
- Save and share your document via email, cloud services, to other devices, and more.
CamScanner remains popular for its speed, intuitive interface, and wide range of enhancement filters. Users like the precise adjustment controls and the app’s organizational features. Downsides include ads and watermarks in the free version.
Also Read: What Can You Do on a Smartphone? Here are the Hidden Tips!
General Tips for Neat and Clear Smartphone Scans
To consistently produce clean and readable scans, keep these universal tips in mind:
- Use Bright, Even Lighting: Ensures clarity and prevents heavy shadows.
- Choose a Flat, Contrasting Surface: Pick a background color that contrasts with your document’s edges.
- Hold the Phone Parallel to the Document: Avoid tilting to prevent perspective distortion
- Rely on Auto-Edge Detection & Crop Adjustments: Most apps are already smart, but double-checking is still mandatory.
- Minimize Reflections: Adjust your lighting angle if the document is glossy.
- Use Multi-Page Scanning: For multiple pages, you can organize the PDF more easily.
- Capture in High Resolution.
- Keep the Camera Steady.
Ready to Master How to Scan With Smartphone?
By exploring these smartphone document scanning methods, you’ll find it easier to keep your papers organized and accessible. Whether for work, school, or personal use, your phone can now handle clean, fast, reliable scans anytime.